Modification Manual
WARNING
Do not make official Reports for bugs if you have made ANY changes to the list, you’re welcome to ask for help in the chats though.
WHAT SHOULD I RERUN?
When customizing a list it can be difficult to know what Outputs need rerunning. The following list is not a replacement for doing your own reading and research, as every mod is different and may require certain things, but as a general rule of thumb:
- If your mod adds ONLY new weapons/armors you shouldn’t need to rerun any Outputs! Always double check though
- If your mod adds ONLY an NPC(s) and nothing else you may only need to run the HPH Racemenu Synthesis Patch (but do your research)
- If your mod changes TEXTURES and/or MESHES you will need to rerun Synthesis, VRAMr (if applicable), ParallaxGen, xLODGen, TexGen, and DynDOLOD
- If your mod makes LANDSCAPE EDITS and/or WORLDSPACE ADDITIONS you will need to rerun the full Gamut including redoing the Grass Cache
Remember that these are your final steps, so if you are adding 10 mods you will do any/all of this AFTER ALL TEN ARE INSTALLED not after each mod
MAKING CHANGES TO THE LIST
When you rerun the full gamut of Outputs, the following is the correct order:
- VRAMr (if applicable) - Textures
- ParallaxGen - Meshes
- xLODGen - Terrain LODs
- TexGen - Billboards
- DynDOLOD - Dynamic & Object LODs
NOTE: If you are using VRAMr, disable it before running TexGen and DynDOLOD. If you are planning to precache grass or rerun ACMOS, only do it after xLODGen.
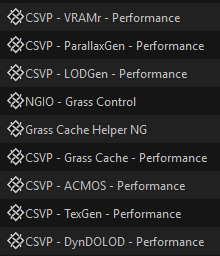
You will also need to open the Outputs Separator and disable the following mods (see image). I highly recommend noting where their plugins were placed in the right pane of MO2 so you can replicate it with the Outputs you’re creating.
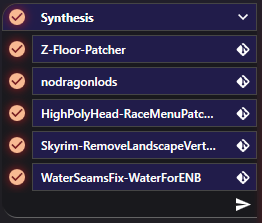
Synthesis
RUN SYNTHESIS FIRST. These are your final steps, so if you are adding 10 mods you will do all of this AFTER ALL TEN ARE INSTALLED not after each mod, as it essentially patches plugins to make mods ‘talk’ to each other correctly. The image below is what CSVP uses and they will be there when you open the program. If you get a “too many masters” error, you can split the patches up into multiple groups. Each Skyrim plugin can only have 254 plugins as its master. Synthesis has a lot of good patches and most have descriptions but these are typically on an as-needed basis when it comes to adding them. Please note that you are able to run individual patches, instead of the entire group, if you just need something specific!
When updating Synthesis, ensure in the Settings that it points to the Data folder for the modlist (e.g CSVP\Stock Game\Data)
VRAMr
VRAMr is a tool meant to optimise all of your texture mods including PBR, Parallax and Complex Material. No scripts, no ESP and no need to start a new game!
Performance Users NOTE: VRAMr is not included in CSVP, I created the Output then removed it. If you are redoing your Outputs you will need to visit the VRAMr page and download the program.
- To begin, install VRAMr as a regular mod and activate it (Load Order is irrelevant)
- From the dropdown menu in the top right of MO2, select
to bring up the Modify Executables Menu - Select the + symbol in the top left, navigate to ‘Add from File’
- Add the VRAMr.bat file as an Executable, this should be located at CSVP\mods\VRAMr\VRAMr
- Ensure you check ‘Force Load Libraries’, hit Apply and OK, then run VRAMr through MO2
- Follow the prompts and steps the Program walks you through, select the level of Optimization you desire
- Select where the Output will Generate for now (I recommend just selecting the drive with the most space [e.g D:\VRAMr])
- Select the Profile you wish VRAMr to target (e.g CSVP\Profiles\CSVP - Main) and it will begin
- When it has finished, you can create an Empty Mod in MO2 and place the Output files inside
The VRAMr Nexus Page includes many wonderful video guides including one from the Dev himself! Please refer to these if stuck
Installing New Outputs
When generating your Outputs it is not as simple as running the program, closing it, and then moving on to the next. These Outputs need to be installed and there are two ways to do this;
- If the Output is loose files, you will create an empty mod by right clicking at the bottom of the left pane, selecting ‘Create Empty Mod’, and then dragging the files into this empty mod
- If the Output is a zipped archive, you will click the icon in the top left of MO2 (hovering over it should say ‘Install a new mod from an Archive’) and select the zip file.
Zipping and Installing is often the best way and should be done whenever prompted unless specifically instructed otherwise
ParallaxGen
This program is the easiest and fastest of the Modification Steps. The correct settings will auto-populate but refer to the image below if you want to double check. If you converted CSVP to use PBR (Community Shaders users) you probably want to enable that option here, and if you swapped from ENB to CS you will want to uncheck ‘Fix Mesh Lighting’ in the top right. 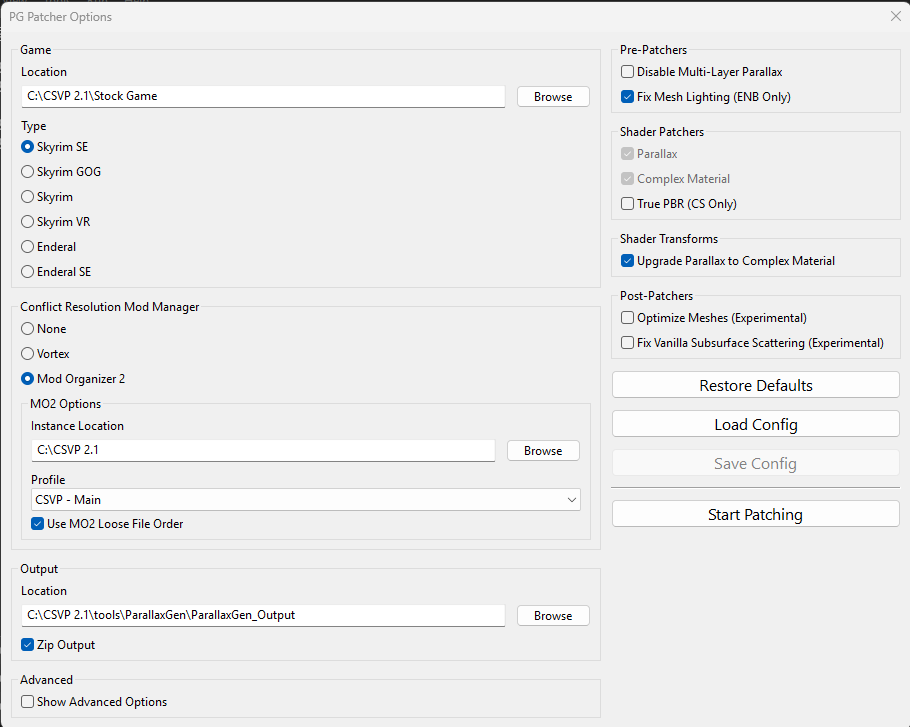
xLODGen
Before beginning, enable ‘xLODGen Resource - SSE Tamriel’ in the Mod Tools & Resources Separator. Place the plugin in the Mod Resources Group under ‘Bittercup - Tweaks and Enhancements.esp’. You may now launch xLODGen through MO2.
When you launch xLODGen the settings I use will auto-populate on the right side, but you will need to select all the worldspaces on the left side (see images below).
NOTE - There are 4 LODs (levels of detail), hence the 4 images, but you will only have to run the program once. To double check your settings navigate to the ‘Settings For’ dropdown menu and click between the LOD Levels!
When you’re finished and have added your new Output, remember to disable ‘xLODGen Resource - SSE Tamriel’
See the video guide from Biggie_Boss if anything isn’t clear enough, or if you prefer visual learning. 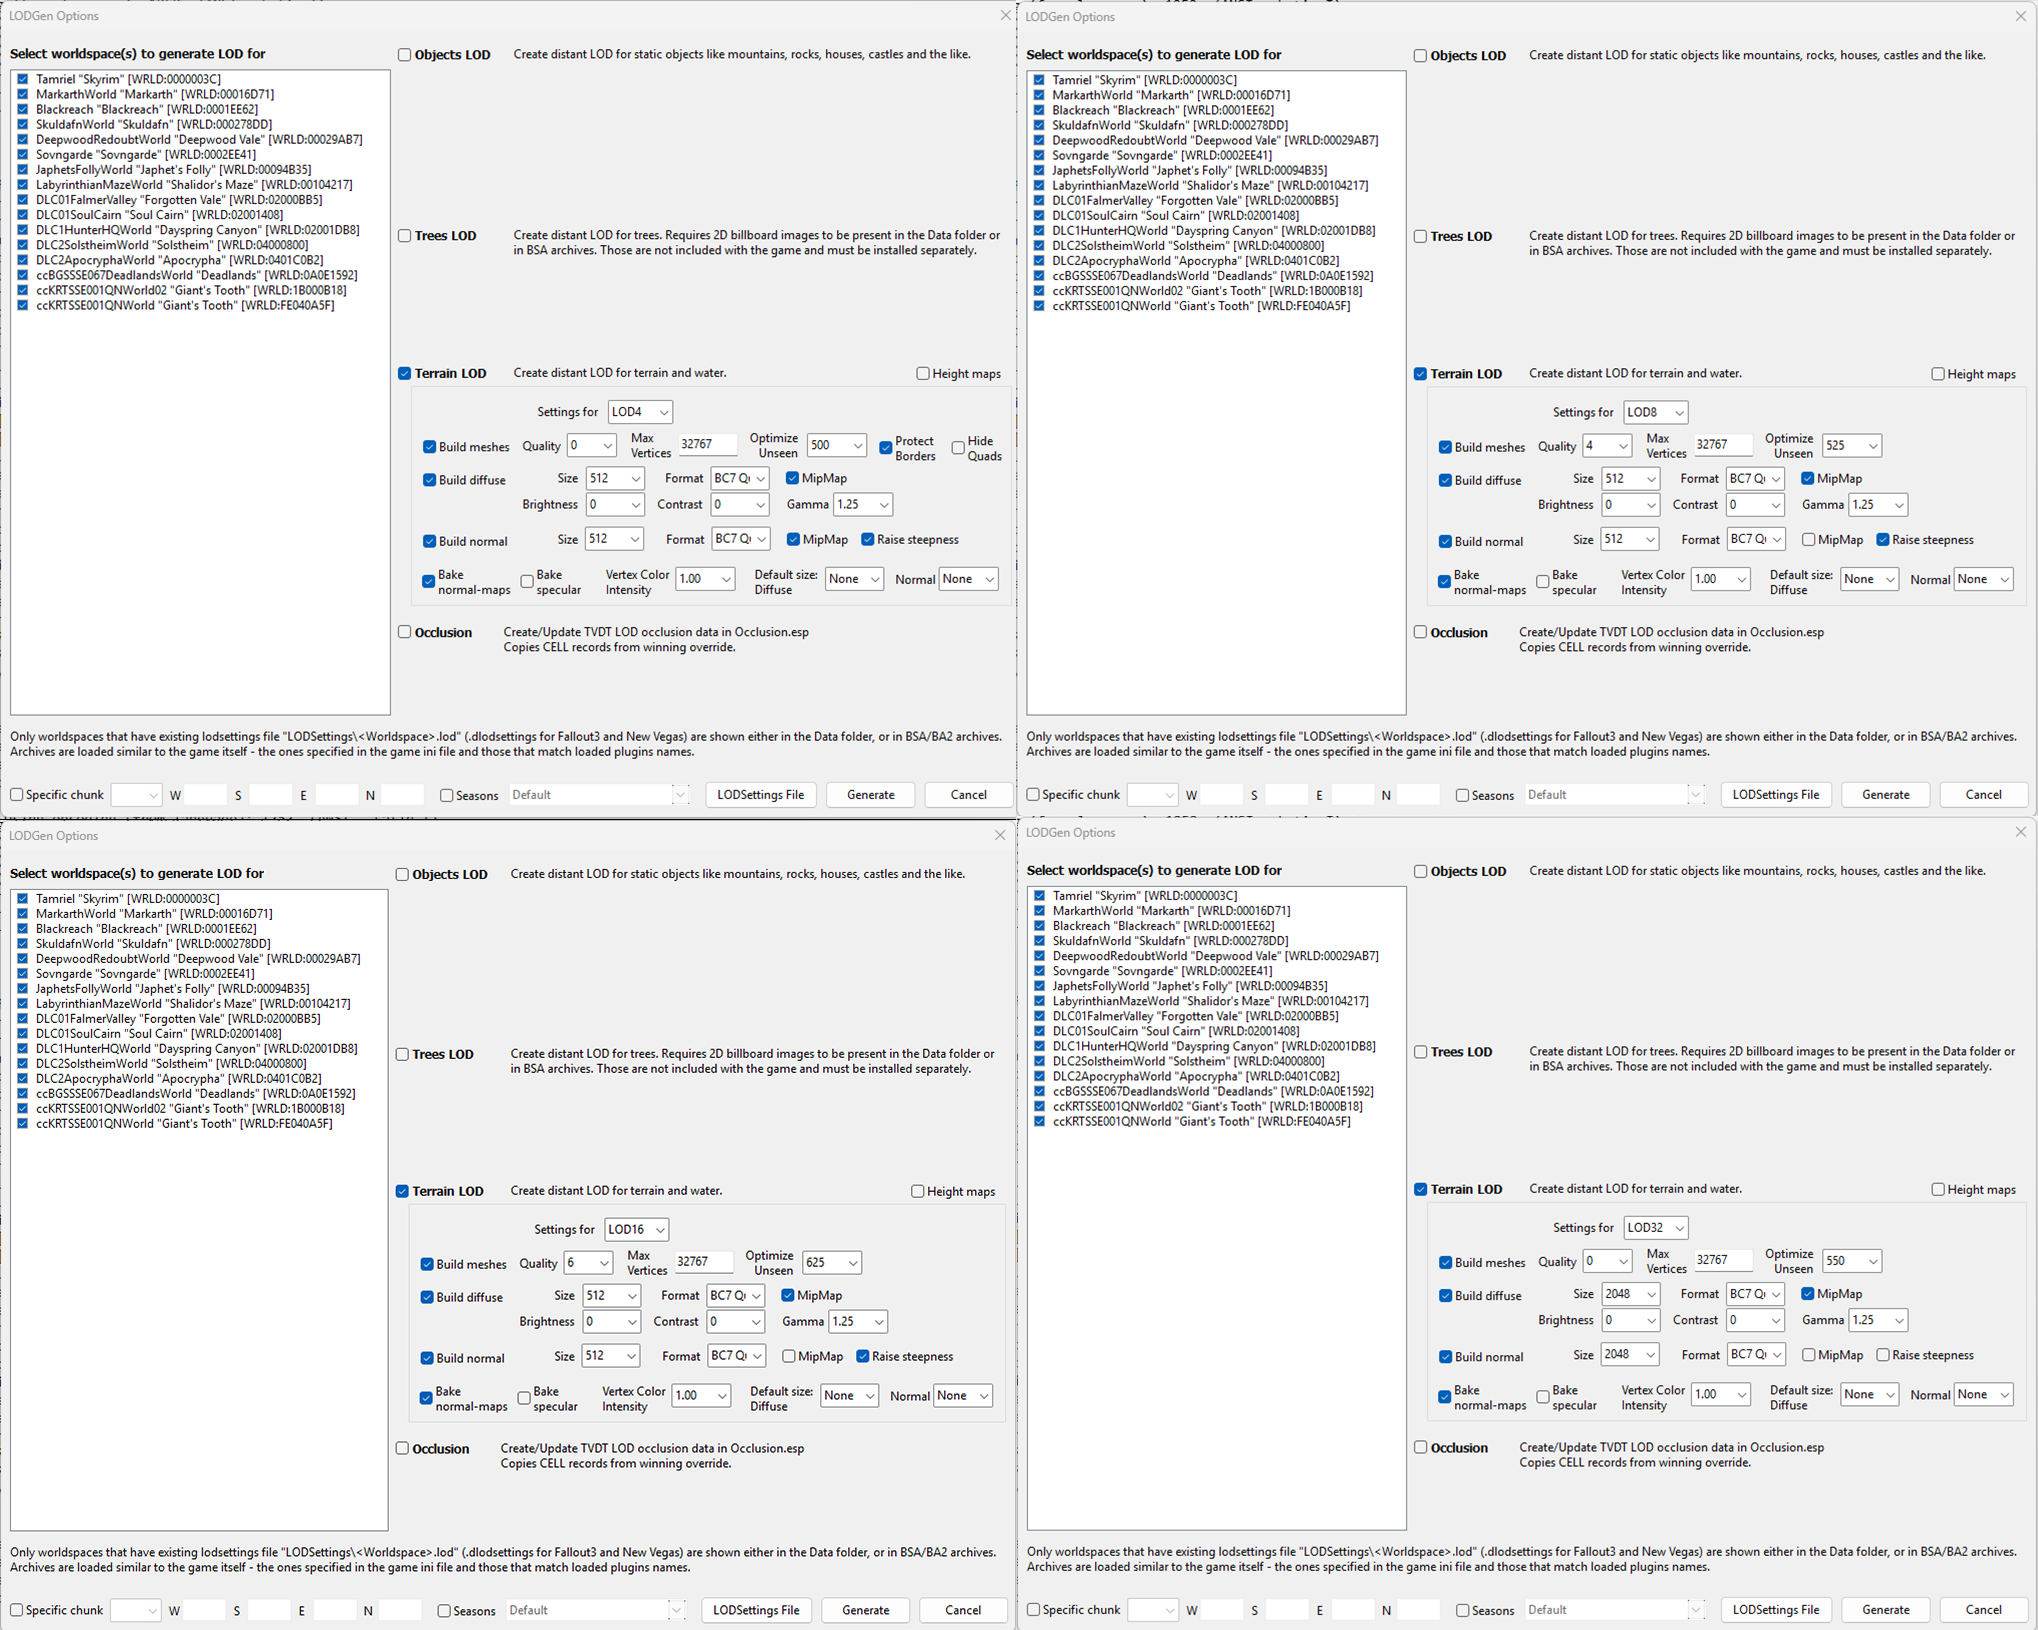
Grass Cache
This will only ever need to be done if you have edited or added a Worldspace, or changed the grass mod. This can fix floating/clipping grass, improve performance, and allow Grass LODs.
Recalculating your Grass Bounds requires the use of Creation Kit which is not included in CSVP. To add the Creation Kit:
- On Steam, install ‘Skyrim Special Edition Creation Kit’ to the same drive you downloaded Vanilla Skyrim and run it once, selecting yes if prompted to unzip files
- Find your Steam Skyrim Install Directory (e.g SteamLibrary/steamapps/common/Skyrim Special Edition) and copy everything except the Data folder into your CSVP Stock Game folder
- Download Creation Kit Platform Extended and extract its contents into the CSVP Stock Game Folder
- Open MO2 and from the dropdown menu in the top right, select
to bring up the Modify Executables Menu - Select the + symbol in the top left, navigate to ‘Add from File’
- Add the ckpe_loader.exe file as an Executable, this should be located at CSVP/Stock Game
- In the Arguments section add -D:”C:\CSVP\Stock Game\Data” (obviously swap C: for whatever your drive is)
- Ensure you check ‘Force Load Libraries’, hit Apply and OK. You are now ready to use Creation Kit
You are STRONGLY urged to make a new profile for this process and name it ‘Grass Cache’. In this Grass Cache profile you will want to disable SkyrimSouls RE in the Gameplay & Systems Changes Separator, as well as EVERYTHING in the ENB (or CS if you use it) Separator, and EVERYTHING IN ALL 3 UI SEPARATORS. When finished Precaching you can simply swap back to your Default Profile and everything you had disabled will be back to normal!
Please follow Biggie’s Guide, it’s how I learned and he will explain things far better than I can!
PERFORMANCE - ADDING GRASS LODS
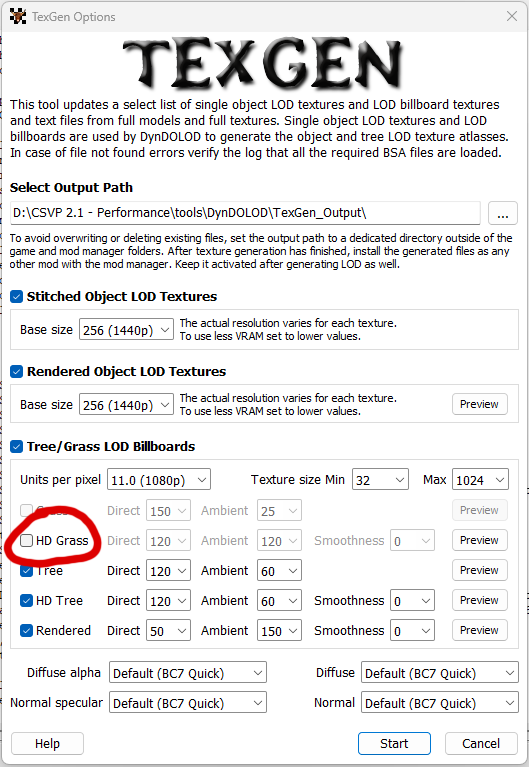
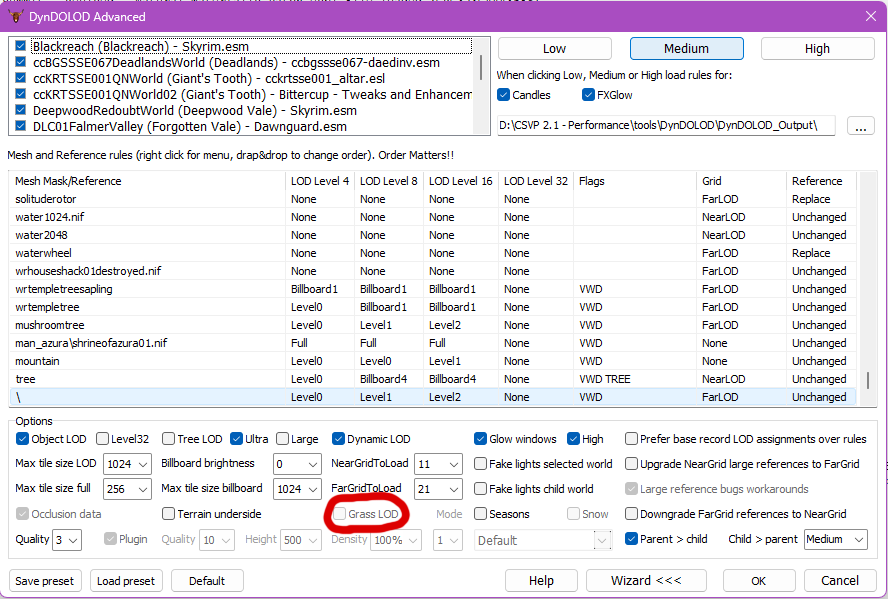
If you are a Performance User that hasn’t modified the list but would like to squeeze out extra fidelity, you could try adding Grass LODs! I’ve already Precached the Grass for you so the process is simpler than doing it from scratch. First, disable the TexGen and DynDOLOD Outputs that are currently in your Outputs Separator (always note where plugins were in the right pane before doing this). Rerun TexGen, following the images below to select the Grass LOD option (ensure ‘Direct’ and ‘Ambient’ settings are both 120), and install it’s zipped Output. Repeat this for DynDOLOD (Grass LOD will not be greyed [Image 2] if you do the TexGen step correctly, lower the density setting to 40%). If you decide in the future that you want don’t Grass LODs after all, simply redownload the Performance Outputs from the Nexus Page and replace the ones you have created!
ACMOS Road Generator
CSVP uses a mod called ‘A Clear Map of Skyrim and Other Worlds’ which uses your LODGen Output to generate a high fidelity, 3D Map of Skyrim that is explorable at angles you’ve never seen! The Road Generator program paints the paths & roads of Skyrim back onto these maps. You should not need to rerun this even when redoing the full gamut, and it can simply be reenabled after you generate your new xLODGen Output as it paints overtop rather than overwriting anything.
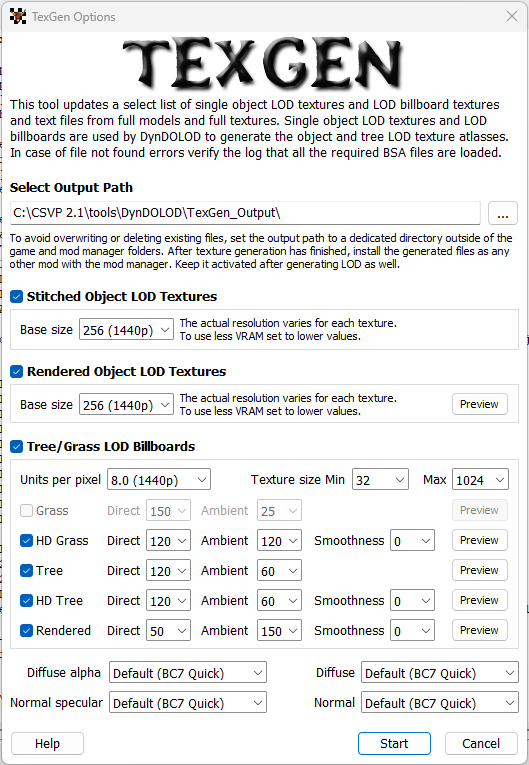
TexGen
This program is one of the easier ones, settings auto-populate so you will be good to go (see the image for the settings I use if you want to double check).
Performance Users that want to double check their TexGen AND DynDOLOD settings scroll back up to PERFORMANCE - ADDING GRASS LODS and reference those images
DynDOLOD
The correct settings will auto-populate but refer to the image below if you want to double check. If you ever have to manually update DynDOLOD please note you may need to scroll to find/edit the Mountain and Azura Statue rules. There are also settings in the DynDOLOD_SSE.ini that have been customized (found in CSVP\tools\DynDOLOD\Edit Scripts\DynDOLOD) and are as follows:
; Billboard template to use for grass LOD billboards created from "normal" grass without normal map textures
; 1 -> Billboard1, 2 -> Billboard2, 3 -> Billboard3 etc.
GrassBillboard=1

; Billboard template to use for grass LOD billboards created from "complex" grass with normal map textures
; 1 -> Billboard1, 2 -> Billboard2, 3 -> Billboard3 etc.
ComplexGrassBillboard=5

; grass LOD brightness multipliers - applied to grass LOD billboards created from "normal" grass without normal map textures
GrassBrightnessTopR=0.610
GrassBrightnessTopG=0.600
GrassBrightnessTopB=0.580
; make bottom darker to fake shadowing
GrassBrightnessBottomR=0.610
GrassBrightnessBottomG=0.500
GrassBrightnessBottomB=0.280

; complex grass LOD brightness multipliers - applied to grass LOD billboards created from "complex" grass with normal map textures
ComplexGrassBrightnessTopR=0.610
ComplexGrassBrightnessTopG=0.600
ComplexGrassBrightnessTopB=0.580
; make bottom darker to fake shadowing
ComplexGrassBrightnessBottomR=0.510
ComplexGrassBrightnessBottomG=0.500
ComplexGrassBrightnessBottomB=0.480

; glowmap and backlighting mask textures replacements if corresponding texture slot is set by used grass billboard NIF
; 0 = keep texture defined in billboard NIF
; 100 = textures\white.dds
; other values generate and use a 4x4 pixel grayscale texture with RGB = 255 * value / 100
GrassGlowMap=0
GrassBacklightMask=0
ComplexGrassGlowMap=0
ComplexGrassBacklightMask=50
NOTE: Biggie’s Guide covers TexGen and DynDOLOD together, I highly recommend watching it! 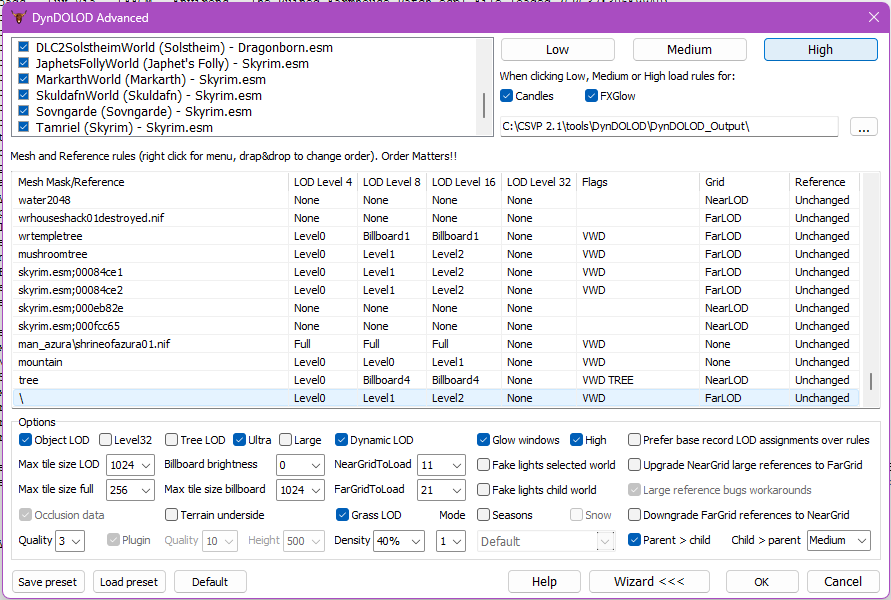
ENB - HOW TO CHANGE ENBs
CSVP comes with ‘Dawnfire ENB’ enabled on both versions, but Main users also have the choice to switch to the optional ‘Cabbage ENB’!
To do this:
- Navigate to the ENB Separator
- Uncheck Dawnfire ENB and the Dawnfire DALC Fix Preset
- Check the Standard DALC Fix Preset, Silent Horizons 2 Shader Core, and Cabbage ENB
- Navigate to the Outputs Separator, find the mod ‘ENB Cache’
- Open ‘ENB Cache’ in Explorer and delete the Root folder
- Every time you swap ENBs you must delete that folder
- Next time you open/close the game a new Root folder will generate in your Overwrite
- Place your newly generated Root folder back in the ENB Cache mod
NOTE: Some ENBs (like Dawnfire) have esp plugins that enter the load order and removing them by switching ENBs will trigger warnings in-game. You’re free to ignore these warnings, though I normally recommend finding the right ENB before starting your playthrough. It can also be helpful to make new profiles for each ENB, ensuring each playthrough has its own tone!
Users looking to switch back to Dawnfire - see the note attached to the mod regarding plugin placement
ENB - HOW TO ADD NEW ENBs
With Root Builder an ENB can be setup like a Mod! Let’s setup Rudy ENB to show the process:
Step 1: Reading - When you choose the ENB you’d like (in this case Rudy) you have to go over it’s requirements and ensure you have everything it needs to work properly. You can lookup mods in your Organizer with the Search Bar in the bottom right of the respective Pane, in Rudys case we only need what’s on the Nexus Page!
Step 2: Preparing - Create an Empty Mod and name it ‘Rudy ENB’, within this new Mod make a folder named ‘Root’. Place this empty ‘Rudy ENB’ mod in your ENB Separator and Enable it. Take this time to Disable any other ENBs and their requirements that would otherwise conflict (in Rudys case this means disabling KreatE and the DALC Fix Presets in the ENB Separator), as well as opening the ENB Cache mod in the Outputs Separator and deleting the Root folder.
Step 3: Installing - Start with any files you can select ‘Mod Manager Download’ as they often contain FOMOD Installer Menus with options for you to choose. Match the name of the file you’re installing to your created Empty Mod so you can opt to Merge them. If any plugins appear in the right pane, try and place them as high as possible without them conflicting with anything (in Rudys case we place the plugin in the Weather Separator under the other NAT Plugins so it wins). For Manual files you will open your created mod with Explorer and place the main files in the ‘Root’ folder you made earlier (for Rudy ENB these main files are the enbseries folder, enbseries ini, and enblocal ini).
That’s it! You can now have multiple ENBs and swap between them on the fly, but beware that some ENBs (like Dawnfire) have esp plugins that enter the load order and removing them by switching ENBs will trigger warnings in-game! You may ignore these warnings, but are nonetheless encouraged to find a look that suits you best before jumping in.